
Interior
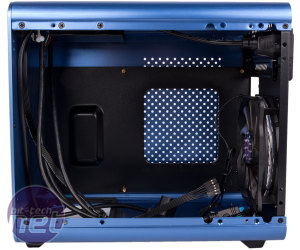
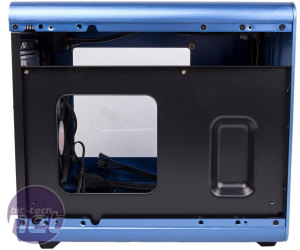
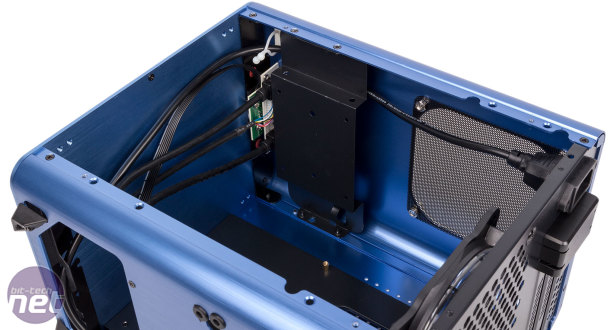
Each side panel is held in place with four flat screws, so you'll need to come armed with a screwdriver. In fact, the entire case comes apart panel by panel if you really want, as it's all held together with screws rather than rivets, and this is bound to appeal to anyone looking to do a bit of modding or make their cable routing game as strong as possible.Motherboard mounts do come pre-installed in the Metis Plus, but make no mistake: This is a tricky case to work with, relatively speaking, and ending up with a build to be proud of will require planning and patience beyond what's required with most modern cases – if you don't install hardware in a specific order or map out where your cables are going to go, it could be an irksome experience. It's hard to fault the Metis Plus too much for this given its size, but we're not going to let it get away with everything on account of that.
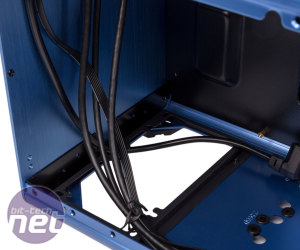
For example, the PSU, which is mounted vertically at the front, is more frustrating to install than it should be. You have to remove the two front feet to fully access the mounting holes of the internal bracket; it's only an extra two screws, but there's surely a better option. Another irritation regarding the PSU is the lack of SFX support. With quality SFX PSUs having long been available in 600W, there's simply no need for ATX power supplies in mini-ITX systems that by their nature can only support a single graphics card. We won't go so far as to begrudge the Metis Plus for supporting ATX PSUs – indeed, it's quite impressive that it does – as this allows users to potentially use existing PSUs, but to not include a simple SFX adaptor bracket just comes off as lazy.
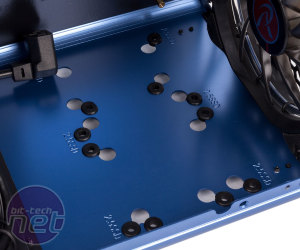
A series of rubber grommets in the case floor allow you to install either one 3.5in drive or two side-by-side 2.5in drives – note that you will need flat SATA connectors for these drives. There's also a removable drive bay at the top of the case that supports one 3.5in hard disk and a 2.5in drive at the same time, the former being secured in the main top section and the latter to the underside.
Raijintek lists the Metis Plus as having a 170mm GPU limit, which is the same width as a mini-ITX motherboard. However, it's actually underselling the case a little here, as there's closer to 240mm of room between the front and back of the case, and we found that you can install cards without interference from ATX PSUs (provided they're 140mm deep and their cables don't jut out too far) or from the drive cage. That said, a 2.5in drive fixed to the underside of the drive cage would interfere, and even without this your GPU fans would be positioned right next to the bottom of the drive cage, so if you can live without the extra storage it's wise to remove it. We did this, and we were then able to install the Zotac GTX 1080 Mini we had lying around without issue, even with the ATX Fractal Integra PSU installed. This is one of the rare instances where this card will fit where other GTX 1080s wouldn't, and we have to say it was pretty cool having a rig capable of 4K gaming in a case this small. Given that M.2 ports (sometimes two) are standard on modern mini-ITX boards, losing that top drive bay isn't necessarily a massive sacrifice either.
There's very little space for cable management in this case. There's a smidgen of room behind the motherboard tray, but only thin and flat cables could fit here, and a bit at the front between the panel and the PSU. Otherwise, you'll be weaving wires around your components – we had to tuck them into various crevices and unplug memory modules just to be able to connect some cables, and at one point we even partially removed the bottom panel so we could hook up the 8-pin CPU power connector. It will be well worth investing in short and flat cables wherever possible with this case. Again, the lack of SFX support is an issue as this would leave you with considerably more room to work with.
Clearly, water-cooling is not the aim of this chassis. That said, you are able to install specific 120mm radiators in the rear fan mount, but that's it without venturing into modding.

MSI MPG Velox 100R Chassis Review
October 14 2021 | 15:04



Want to comment? Please log in.