
Interior
The side and roof panels are held in place by a series of clips all around their perimeters, and removing these panels is as easy as grabbing the overhanging bits at the back and pulling. It's similar for the front panel, except a thumbscrew on the underside must be removed beforehand.The unusual interior design takes a while to get accustomed to, but in terms of quality the persistent use of aluminium is hard to argue with. That said, some of the edges are a bit sharper than we're used to these days. We do like that all the thumbscrews used (and believe us, there are a lot of thumbscrews used) have rubber washers on them though.
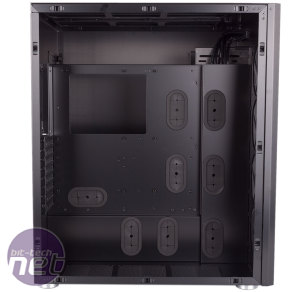
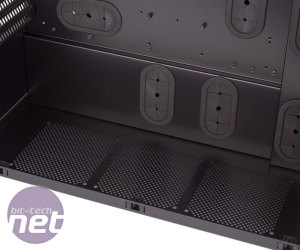
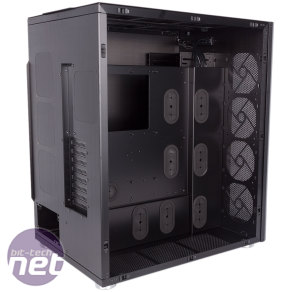
The sheer size of the case means there is simply loads of space to work with. The main chamber will make any size motherboard, CPU cooler or graphics card look tiny. Pre-installed motherboard mounts, PCI bracket thumbscrews and a large CPU cooler cutout make your life easier still. On the other side, the PSU is treated to thick rubber rails to rest on so as to dampen vibrations, although there's sadly nothing isolating it from the rear panel.
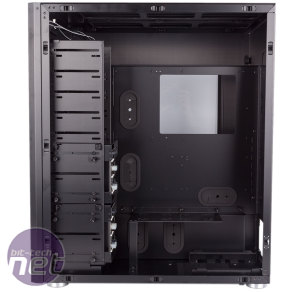
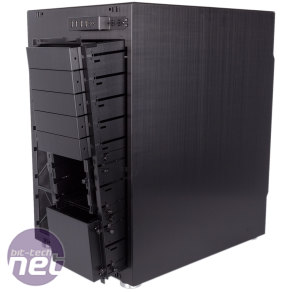
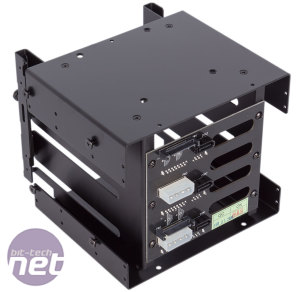
At the front of the secondary chamber is the massive drive cage, comprising five 5.25in bays and two cages for internal drives below. Usually, we'd be critical of a case giving this much space to 5.25in bays, but in a chassis like this it does make sense as they can be used for fan control modules as well as reservoirs. With the case front panel off, releasing four thumbscrews will actually allow you to remove the ODD/HDD column in its entirety.
Four more thumbscrews will remove the cover for one of the internal HDD cages, and four more will then release the cage fully. Each cage supports three devices via the hot-swap panel at the back, which even allows you to choose whether you power your drives with Molex or SATA connectors. Sadly, the drive sleds supplied only support 3.5in devices in these bays. It's almost unbelievable that 3.5in/2.5in universal trays are not used instead. Anyone wishing to use a 2.5in device has to secure it either to the top or bottom of one of the two HDD cages. This is far from convenient, especially as the hot-swap panel on the back makes getting cables to any drives in these locations difficult. There are no further 2.5in mounts anywhere in the case despite its massive size.
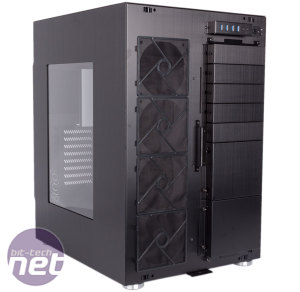
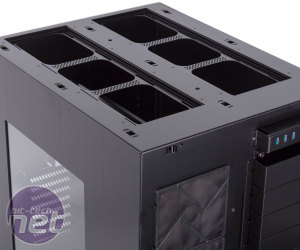
Water-cooling is of course a primary focus for a case this size. We actually asked 8Pack about the lack of 140mm fan support and he told us fairly bluntly that he doesn't rate them highly for water-cooling scenarios. We can't say we're too bothered, as even without them there's plenty of room for radiators. In the front, you can fit a quad 120mm beast, and there's room for dual 360mm radiators in the top too. Both of these areas have massive clearance levels, so you can use full thickness radiators in push-pull without worry. The floor of the case and the back of the secondary chamber could also be put to use with two more 360mm radiators – the bottom isn't officially supported, but we see no reason why one wouldn't fit.
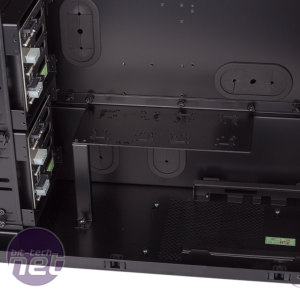
In the secondary chamber, there's a bracket specifically for custom water-cooling loops, with a large variety of mounting holes suitable for all different pump and pump/reservoir combos. This bracket is fully removable via four thumbscrews. In short, we can't see any reason why this case couldn't cool a three or four GPU overclocked X99 system in virtual silence given how many radiators you can cram in. To be honest, if you're the PC-D888 it for anything other than such an extreme system, you're doing it wrong.
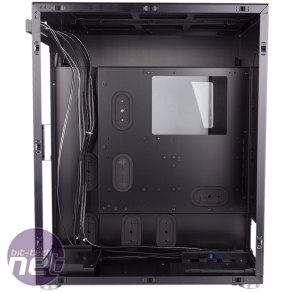
Of course, if you are building such a case, you'll want it to look flawless, which is where cable routing comes in. Since the motherboard tray does not extend to the top of the case, there is masses of room above the motherboard for any cables or tubing that needs to pass this way. Immediately around the motherboard, there are eight large routing holes, each affixed with a high quality rubber grommet. The three closest to the motherboard (two to the side, one below) pass directly through to the other chamber and are useful for all the usual motherboard header and power connections.
The other five are a little more interesting, in that they pass into a cable routing channel, keeping cables hidden from both sides. Viewed from the secondary chamber's side there are a couple of panels that make up the other side of this channel, and they have holes, again with grommets, to match the ones on the motherboard side. This channel is mainly used for the front I/O cables, but it could be handy for others. In most instances, however, you won't need to thread cables into this channel but rather straight through it – the grommets are big enough for anything and this method will still hide everything out of sight in the cavernous secondary chamber. You could even pass tubing directly through the channel using the double-sided hole system. The panels are a bit fiddly to work with, but part of the point of the PC-D888 is that you're willing to work with it to get your rig looking just perfect. After all, you're likely to have many thousands of pounds worth of gear inside, so it's worth the time taken. That said, the space actually inside the cable routing channel could definitely be greater.

MSI MPG Velox 100R Chassis Review
October 14 2021 | 15:04



Want to comment? Please log in.