Interior
The usual four thumbscrews hold the tempered glass side panel in place, while the steel panel relies on captive thumbscrews and a notches and rails system that feels dated in a case with USB 3.1 Type-C; we really think all high-end cases should use a hinged design instead.


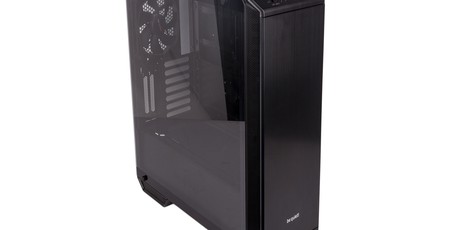
Inside, the Dark Base 900 offers a regular tower layout with a PSU cover by default, although it does give you the option of inverting the layout (more on this in a moment). Rubber is used throughout the case to help decouple components and reduce potential noise; the PSU has large rubber struts and padding against the back of the case, for example, and the HDD trays are treated to rubber grommets as well. Even the fans have built in rubberised mounting corners. Pre-installed motherboard mounts include an extended central one to hold the board in place initially, and each expansion slot cover is held in with a thumbscrew – attention to detail in this case certainly isn't lacking.

The PSU shroud is made of several removable panels (four on the top, one facing the window), and these are made of plastic and are a little fiddly to work with. We're not sure this level of modularity is truly needed, but it does allow you to make way for radiators at the front and for airflow from a bottom fan, should you choose to install one.

The Dark Base 700 has a total of seven HDD mounting sections, although only three trays are included in the box (you can buy more separately). That said, these metal trays are pretty nifty, as they allow you to install either one 3.5” HDD or two regular height 2.5” SSDs (one top, one bottom). You can also reposition them as you see fit, picking between the two default positions in the cage that's hidden beneath the PSU shroud or any of the five mounting points in the main cavity. To use these, you squeeze out the protective covers and slot the drive tray in place, securing it with three thumbscrews.

In case that wasn't enough storage for you, there are also three more dedicated 2.5” mounting points behind the motherboard tray: one on an individual mounting sled and two on a shared one. The trays are again made of metal and fixed this time with single thumbscrews.

The flexibility of this case doesn't stop there. As we mentioned, you can invert the layout, and Be Quiet! has done a great job of this. It's of course a multi-step process involving numerous screws, but it's actually straightforward, and the manual makes everything very clear. The best bit is that you retain all of the functionality and even the aesthetics, as the side panels support being swapped over too, and even the window-facing, logo-touting cover of the PSU shroud can be switched to the proper side.
Another potential layout tweak is having a vertical GPU, as the back panel has the necessary brackets to support this. That said, the case does not ship with the brackets or riser cable needed, which makes sense since for most they would be an unnecessary extra cost.

The fan and LED control hub fixed also to the back of the motherboard tray is another impressive element. The two case fans and the LEDs in the front panel and front foot come pre-connected, so all you need to do is wire up the single SATA power connector (not Molex, yay!). You can also connect the PWM cable to your motherboard if you want this option available from the fan controller, but it's not necessary, and likewise the RGB cable can plug into your board if supported. It's a brilliant way of balancing pure hardware control with the finer granularity offered by motherboard EFIs and software. You can connect six fans in total, and these are split into two channels of three each. Each channel can be set to Silence of Performance mode using the fan hub's switches, and this alters how fast the three speed settings will run the fans. You can also connect additional LEDs with the single connector, although only 12V LEDs are supported.


Be Quiet! has a few tricks up its sleeve for cable management, too. Velcro cable ties are supplied in the box, although we prefer when these are fixed to the chassis itself, as they're easier to work with then. The plastic covers for the HDD mounting holes also serve a purpose here, as they can be height adjusted through three steps rather than removed completely, allowing you to thread cables of varying thickness through. You can even snap the side tabs off behind the motherboard tray to make way for cabling. The main routing holes are covered by grommets as well, and these worked well in our experience. Our only real complaint is that the area above the motherboard tray is very tight, but we managed to build a very tidy system with ease nonetheless.


For water-coolers, radiators up to 360mm in the roof and up to 280mm or 360mm in the front are supported. The roof features a nifty slide-out radiator bracket for easier installation of fans and radiators, and even this is one of the components that gets reversed when inverting the layout. There are no dedicated mounting points for pumps or reservoirs, which is a shame, but the case is spacious enough that building a custom loop shouldn't be too much hassle.

MSI MPG Velox 100R Chassis Review
October 14 2021 | 15:04


Want to comment? Please log in.