
Following on from Part 1, PilouX takes us through the final stages of his jaw dropping creation...
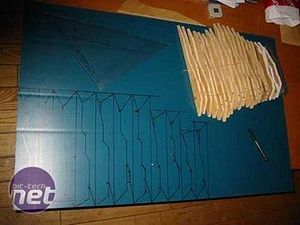
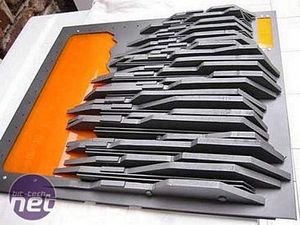
My first attempt to make the combine wall saw me cutting plywood pieces to form the structure. The result didn\'t turn out quite clean enough for my liking, so I turned my attention to a Forex panel. (A type of expanded PVC sheet).
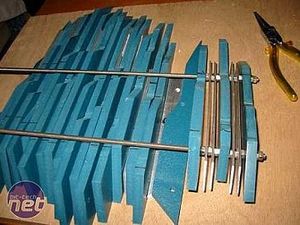
Here you can see that I added aluminium pieces to improve the walls appearance and retain the look of the different thicknesses of the structure.
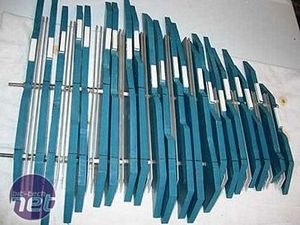
The whole lot is held together with metal rods running through all the pieces.
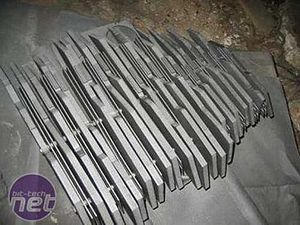
Two coats of grey paint later here is how it turned out.
The \"wall\" was fitted to the side with screws from behind the panel.
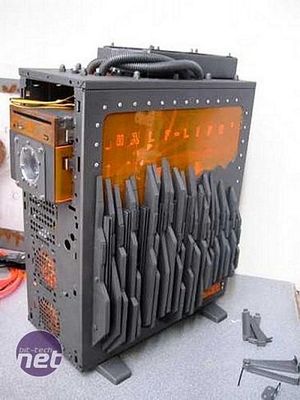
The panel fitted to the case plus a few more pop rivets for good measure...

Even without backlighting, the window is looking good.
My first attempt to make the combine wall saw me cutting plywood pieces to form the structure. The result didn\'t turn out quite clean enough for my liking, so I turned my attention to a Forex panel. (A type of expanded PVC sheet).
Here you can see that I added aluminium pieces to improve the walls appearance and retain the look of the different thicknesses of the structure.
The whole lot is held together with metal rods running through all the pieces.
Two coats of grey paint later here is how it turned out.
The \"wall\" was fitted to the side with screws from behind the panel.
The panel fitted to the case plus a few more pop rivets for good measure...
Even without backlighting, the window is looking good.
RELATED ARTICLES


MSI MPG Velox 100R Chassis Review
October 14 2021 | 15:04

Want to comment? Please log in.