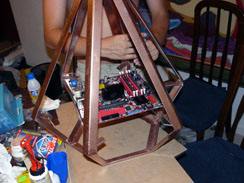
Returning to the main chassis it’s worth pointing out that instead of constantly using copper we often resorted to the aluminum, especially for the interior frame, since copper is quite a heavy metal. Whenever possible we tried to lighten the overall weight of the mod using aluminium plates. To make sure we had enough material we ordered in several metres of aluminum plate of 2mm of thickness and 4cm of width. This plate was folded to 120 degrees, to facilitate the later installation of copper plates.
The construction of the aluminum skeleton was a very delicate task. As many you will know, aluminium is difficult to weld and we had to use many complex techniques. The process of welding the aluminium frame meant that we couldn’t be entirely sure of the exact size of the final mod too, as parts of the aluminium were burned off or joined together. To ensure we didn’t waste materials we didn’t cut our copper plates until the frame was totally finished.
Getting the fit of the copper plates to the aluminium frame right was a critical step in the construction of this mod. Copper is very expensive, so we didn’t have any leftover metal to patch up holes with, nor could we afford to buy new materials. To make sure we got the cuts exactly right we used a CNC machine to get copper plates that would slot perfectly into place.
The process of CNCing the copper wasn’t as easy as it might seem though, mainly because we had to be careful to get the design right the first time. If we broke the drill bit or sheared some of the metal then there would be no extra metal to work with.
Despite all our worries and attention to detail though and no matter how much we tried to avoid this, we still managed to break a pair of drills. An entire separate article could be dedicated to the ardent shaving that came out of this, but the end result was that we were able to save all the plates we needed.
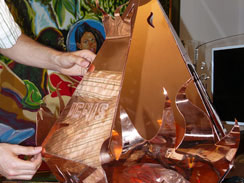
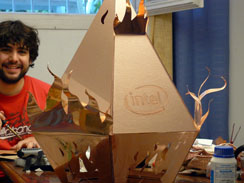
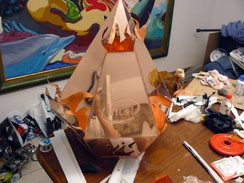
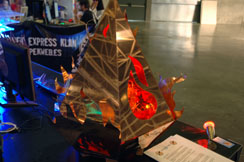
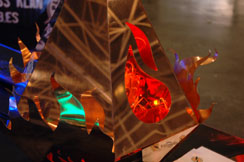
A careful eye will also note that we’ve added small holes to the sides of the Ignis, near the top. These holes will let hot air out of the top of the case and are important because we don’t have any vent points in the rest of the chassis. Other cuts, like can be seen in the images below, are windows, logos and a grid in the base of the chassis for the air intake.
In order to get the perfect cut the sides were removed and checked several times and were constantly cleaned, shaved and flashed. Also some angles were reviewed, since the radius of the drill could not realise certain very acute inner angles.
At this point we also started to put the hardware inside the case, which should hopefully let you start to get a proper sense of scale with the mod – it’s a lot bigger than it seems at first!
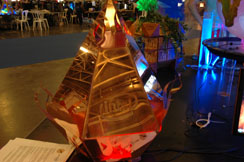
The next stage was adding in lights to the mod, which we did using lots of red, orange and yellow LEDs. These lights were then hooked up to a custom-made circuit that made them glow and pulse in a pattern we decided was as evocative and fire-like as we could make.
One problem we did come across though was that the two metals we used, copper and aluminium, cannot be welded together at all. To combat this we used a special polymer resin to fix the two metals in place, though we did leave two panels that could be easily removed when needed. How else would we be able to get in the case and carry-out all the inevitable system repairs?
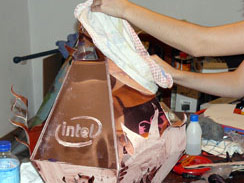
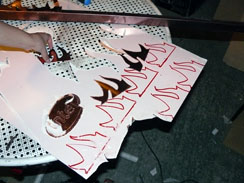
This picture shows the most boring and repetitive task in the creation of this mod – the constant cleaning, waxing, polishing and drying of the copper using the protective resins we had bought earlier. It was tedious work, but the only way to be sure that the copper would maintain the finish we were after.
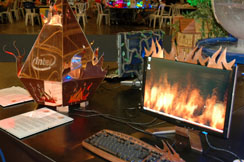
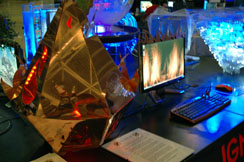
As with all the other mods in this project, we wanted the mod to represent a complete PC experience, not just a scratch-built chassis. As such, we promptly turned our attention to the peripherals and got to work on decorating the mouse, keyboard and monitor.
We started with the keyboard, completely dismantling it and painting it with a shiny copper spray. We then used one of our few pieces of leftover copper to fashion a flame motif, which was then stuck on.
For the monitor there really isn’t much to say. We painted parts of it with the same copper paint, put a few copper flames on it and changed the windows wallpaper to suit the theme.
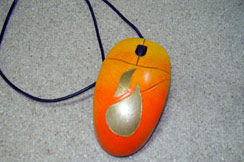
The mouse also was disassembled and sandpapered. In order to give the mouse the right colour it was painted with two layers: a yellow base and an electrical orange on top of this. In center of the grip a small flame, present in other elements of mod, was made from thin gold foil.

MSI MPG Velox 100R Chassis Review
October 14 2021 | 15:04




Want to comment? Please log in.