Santa’s Sack
As we were trying to actually to make our mod look like a Christmas tree, it would be poor form to just have the tree cone sitting on the floor. So, my cunning plan was to have a few hundred quid’s worth of kit balancing precariously on a pole, which would also form the ‘trunk’ of the tree. For this reason weight was going to be a major factor, especially if the components were resting mid tree, raising its centre of gravity.Nestling in the CPC kit stockpile we have a diddy Epia 5000 motherboard that has been crying out to be wedged in a small dark place for months. It’s frankly pretty useless for any kind of normal PC system, so it was an obvious choice for the project. As a Christmas tree PC isn’t likely to see year-round usage, we thought a simple system for playing Yule-tide ditties, presenting family holiday snap slide shows, and a bit of Internet surfing would be fine. Also, since we weren’t planning on adding additional in-tree cooling, the passively cooled Epia 5000 was the perfect festive accessory.
To further minimise the weight of the components we decided to use laptop-sized drives and the lovely chaps at mini-itx.com donated a minuscule 2.5in hard disk and a laptop-sized DVD/CD-RW, in addition to a bunch of other kit. We opted for a slot loading optical drive, so that we wouldn’t have to wrestle with trays and spindles, thus reducing the possibility of knocking the tree over when we inserted or removed a disc.
The full component list is as follows:
- Motherboard VIA Epia 5000, www.mini-itx.com
- Memory 512MB PC133, www.crucial.com
- PSU 55W PSU and DC converter kit, www.mini-itx.com
- HDD 40GB Hitachi 2.5in, www.mini-itx.com
- Optical Drive Panasonic Slimline Combo, www.mini-itx.com
- Tree 90cm cone tree, Christmas Tree warehouse
- Extras 2.5in to 3.5in hard disk adapter, 2.5in to 3.5in optical drive adapter both from www.mini-itx.com
Elf's Workshop
As I mentioned before, the mod is based around - well more like underneath - a hollow Christmas tree. To give the impression that it was a ‘real’ Christmas tree as opposed to a green cone with some tinsel on it a trunk, we needed a suitable container to act as the pot.I used a bucket or planter, which holds the power brick and acts as a breakout box with power, monitor, USB and audio outputs to allow peripherals to be attached. Hopefully keeping all the connections at the base of the tree will prevent a lot of unnecessary stability problems when it comes to plugging in and unplugging peripherals.


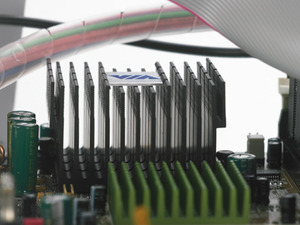
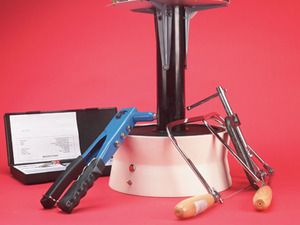
Left: We didn't want our tree to be so noisy it would drown out the Queen's speech, so passive cooling was the order of the day; Right: the trunk is made from a drainpipe and acts as a conduit for cabling
A trunk system, otherwise known as a drainpipe, sits on a stand with a compact 55W PSU circuit board strapped to it at the bottom (the Morex PSU comes in two parts). The trunk acts as a conduit to pass cables from the motherboard to the outlets in the base.
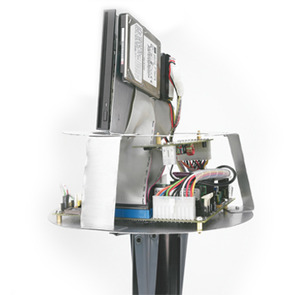
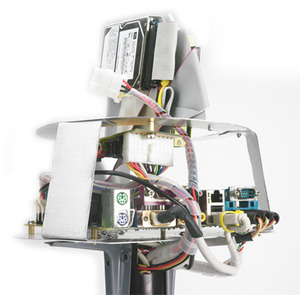
Fixed to the top of the trunk is what can only be described as a bird table, cut from an old aluminium midi tower chassis. It’s in two main layers to provide a firm seating for the canopy section, which, weighing in at about two and a half kilos will need to sit in a reasonably precise position or the whole thing will topple over.
I needed to work out where the motherboard will actually sit within the canopy, so I could get the exact measurements for the ‘bird table’. Not being a great one for measuring accurately, I generally make things in cardboard first and then use that as a cutting template.
The first thing to do was make a circular shelf for the motherboard to sit on, but not having even the most basic tools, such as a compass, made it somewhat tricky to draw and cut precise circles. Fortunately it’s not too difficult to make a compass, so more cardboard was cut into a makeshift ruler and strengthened with packing tape. Punch a couple of holes in it with a Phillips head driver and away you go. Disappointingly, for my bank account at least, fretsaws aren’t quite so easy to fabricate. Having cut out a base the simplest way to make the rest of the bird table chassis was to place the cardboard tray into the tree, now stripped of foliage, and take dimensions straight from the canopy.
The canopy, when stripped looks just like one of those wire cones they use for playing rounders in schools, with a central ring to add strength to the structure. I measured up to this ring for the placement of the second support layer in the chassis. To stop the whole thing compressing when the canopy is placed on top of the chassis, the supports for the second level were placed so that they would be supported internally by the canopy.

MSI MPG Velox 100R Chassis Review
October 14 2021 | 15:04


Want to comment? Please log in.